There’s no need to spend excess money on a quiver for archery. You can make your quiver at home using materials that should be readily available. One of the first steps is figuring out how large of a quiver you need. The standard size is about 13-15 inches in circumference and 20 inches in length.
The instructions below will cover 3 types of simple quivers that can be made at home: basket, leather, and PVC. A few hand tools may be necessary to have on hand: sewing awl, leather punch tool, and a drill, among various other tools and materials.
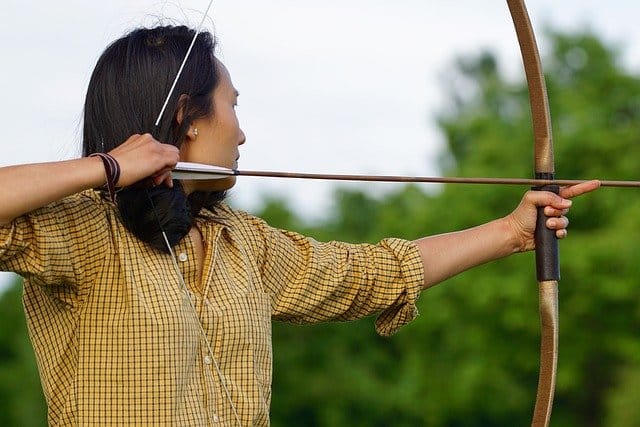
One massive benefit of DIY quivers is the ability to fully customize the design, as you’ll see in the sections below.

How To Make A Basket Quiver
Basket Quivers can be made using the same materials that you would find at a basket-making supplies vendor. This set of instructions from the California Traditional Archers calls for Chinese reed and bamboo chair cane (3/16″).
Here are the materials used in these instructions:
- ¼” Flat Chinese Reed
- ⅜” Half Oval Chinese Reed
- ¾” Flat Chinese Reed
- ⅛” Round Chinese Reed
- 3/16″ Bamboo Chair Cane
Once you have gathered your materials, remove enough of these from the packaging to fit one quiver. The CTA Basket Quiver instructions ask for 11 uprights of reed, each measuring 25″ in length and ⅜” in diameter.
Soak The Reeds
Whenever you use reeds to form an object, you will need to soak them in water first. Reeds are very dry and brittle, making them hard to work with at this stage. If you let them soak for a while, they will soften and become more malleable. You don’t have to worry about soaking them for too long.
Dye
The dye process is entirely up to you. Be creative as you would like, as this is the best opportunity to do so. Of course, you could probably make a functional quiver without the dye, but the stain makes the quiver look much more presentable. The type of dye you choose will affect how complex this process will be.
- Alcohol-based dyes are easier to work with since they don’t bleed through the reeds and dry fast.
- Water-based dyes offer more muted color variations, which can better blend into natural surroundings.
- Be sure to wear gloves throughout the dyeing process.
Trim The Center Of The Reed
The half-oval reed uprights must be trimmed in the center. Otherwise, it’ll be more challenging to shape them into a basket. The recommendations for trimming the uprights are simple.
- Always make sure the reeds are soaked in water first.
- Trim the flat side of the half oval.
- Cut back 5-6″ length-wise.
- Trim down to about half the thickness.
Use A PVC Pipe To Shape The Basket
Find yourself a 2.5″ diameter Schedule 40 PVC Pipe to make a 3″ diameter quiver. This will be used to form the shape of the quiver. You could use any similarly-sized object to help form the basket, but you will need to use a rigid object to help form the quiver.
Weave The Bamboo Through The Reeds
Perhaps the most challenging part of the process is the weaving of the bamboo through the upright reeds. It requires a fair bit of craftsmanship, although it is certainly not impossible to do if you follow the steps in the section below.
- It’ll be helpful if you can place the PVC form in a vice to keep things from moving out of place. A 2×2 in a vise works well for these purposes.
- Use rubber bands to hold the reeds in place while you weave.
- Tie the uprights together at the top of the form.
The bamboo should’ve been left soaking for a while. At this point, you can take it out of the soaking tub and stick it under one of the uprights at the top of the form. Proceed by weaving it over and under the uprights in alternating fashion until the entire form is covered.
How Tight Should The Weave Be?
The bamboo weave should be snug against the quiver, but things shouldn’t be so tight that the shape of the quiver begins to become deformed. Make sure that each row of bamboo is snug with the neighboring rows of bamboo.
Switch To The ⅛” Round Reed
At the end of the tapered section of the quiver, it’ll be time to hang materials to the ⅛” round reed. At this point, it’s essential to over weave a small section of the round reed with the bamboo-section so that everything blends together.
You are encouraged to go around the form 8 times or so before switching to the next material, which will be the ¼” flat reed.
Finish The Form
The remaining materials are used to finish off the weaving process. As before, it’s not a bad idea to make sure that you are overlapping separate materials when you make these switches so that everything blends in appearance and is kept secure.
- ¼” Flat Reed: Do a few circuits with this material after running the ⅛” round reed.
- ⅛” Round Reed: Weave in another 8 turns of the round reed.
- ¾” Flat Reed: This will end up being in the middle of the quiver. Make sure it’s tapered at the ends for a smooth transition. Cut it after soaking it.
After the middle section of ¾” reed, you’ll transition to the ⅛” round reed once again. After running this for a few turns, you are encouraged to weave in another section of ¾” flat reed. You may bound things together with bamboo.
It may be beneficial to finish off the top of the quiver with a ⅛” round reed at the last remaining circuits. Cut off excess upright length once you’ve reached the desired quiver length.
Remove The Quiver From The Form
It’s normal for it to be tough to pull the finished quiver off the form. This is because reed materials shrink as they dry. You can make things easier by adding wax to the PVC form before trying to pull the quiver off.
After pulling the form off:
- Bend each upright 90 degrees.
- Tuck them into a neighboring upright.
Attach A Strap To The Quiver
The final part of the process will involve attaching a strap to the quiver. An adjustable strap would be nice, but it’s up to you. There are many different ways to go about attaching a strap.
- One recommended method involves weaving in rings of ⅛” round reed to attach the strap to the quiver.
- You may use an awl to make room for the strap.
- You are encouraged to double loop the strap so that the strap won’t deform under the weight of the arrows.
You may also make a leather strap with an adjustable strap, a topic which is covered in further detail in the section below covering the instructions for making a leather quiver.
How To Make A Leather/Faux Leather Back Quiver
You can easily make a leather or faux leather quiver instead. The process involves a little bit of handcraft, as you’ll need to be able to weave a lace through punched holes and stitch up the ends. In the end, you’ll have a simple back quiver with a nice rustic look that costs significantly less than the quivers at the store. These instructions have been adapted from this video:
Gather Your Materials
Start by selecting either faux leather or genuine leather crafting sheet. Artificial leathers are more affordable and sustainable than genuine leather. The one downside is that faux leathers are generally less durable than the real thing.
After picking out the leather, you will have a few more materials and tools to gather:
- Genuine Leather/Faux Leather
- Leather Hole Punch Tool
- Strap (Faux or Genuine)
- Buckle for strap
- Sewing Awl
- Leather lace/string
- Washable Marker
Cut The Leather Sheet
Start by cutting the leather sheet to the desired dimensions. Typically, back quivers will have a circumference of 13-15″. As for length, go for approximately 20 inches, which is pretty standard for the industry. Once your piece meets the desired dimensions, form it into a tube with your hands and grab your leather hole punch tool.
Form The Top
You will punch several evenly-spaced holes around the circumference of the quiver at the top. Proceed by weaving the lacing material through the holes. Leather or faux leather looks nice as a lacing material, but you can use any string or cord that fits through the selected hole size.
Hole punch tools are nice because you have a wheel of hole size options on the tool. Once you have laced the string through the entire top of the quiver, form a knot to close off the top.
Lace The Side
Punch evenly-spaced holes along one side of the leather piece using the leather punch tool. Before moving to the next side, you must mark where the holes are so that the two sides of the leather are evenly matched.
- Form the quiver as you did before.
- Take a washable marker and mark a spot through every hole onto the opposite side.
- Finish by punching adjacent holes on the opposite side of the leather piece.
- Then you will weave the string/cord through the holes as you did before at the top of the quiver.
- You can tie a knot at the upper and lower terminal of the side to keep things in place.
Attach The Bottom Piece
You will need to have a bottom piece or cap that is strong enough to support the arrows and won’t be torn through. There are a couple of potential solutions as far as bottom caps go:
- Lace in a piece of leather or faux leather that is stronger than the rest of the quiver, such as this extra-thick faux leather.
- Use professional glue to attach a Plastic/PVC end cap that looks like this.
Attach The Strap
The strap needs to be adjustable so that the quiver can fit every size. Luckily, it’s not hard to find belt buckles for crafting purposes. You can see the strap on using a tool called a sewing awl.
Instructions for using a sewing awl can be found here. This tool allows you to sew together these parts without having to use a sewing machine, which can be a considerable investment for someone who doesn’t envision themselves sewing very often after this project.
Tips for making adjustable straps, in general, can be found here.
Simplest Style-How To Make A PVC Quiver
If you are doing target practice from an established shooting line, then all you need is a ground quiver. Yes, you can find plenty of ground quivers at the store, but why spend the extra money when you can just make your quiver using materials you probably already have on hand.
You can also make this into a simple back quiver if you add a strap and minimize the size of the base platform, or add an end cap on the bottom of the PVC instead.
Here’s what you need:
- 4″ PVC pipe 15-20″ in length
- Flange and piece of wood for the base
- Fasteners: screws, brads, or nails
Glue a closed flange over one end of the PVC pipe. As an alternative to glue, you may cut a hole through a 1″ piece of pine or ¾” plywood large enough to be centered under the PVC.
Drill small pilot holes in the pipe and fasten it to the wood with either small screws, brads, or nails. Then cut another piece of wood larger than the first and attach it to the bottom of the first piece of wood. If you drill a couple of holes just inside the edge of the bottom piece, you’ll be able to install a dock spike/anchoring device to keep the quiver in place.
Final Thoughts
In the sections above, you are introduced to three simple designs for DIY arrow quivers: basket, leather, and PVC. There are many different ways to customize the final design, although helpful tips and instructions are included above. This is a fun and economical way to obtain a piece of archery equipment that is necessary.
Now when you did your own arrow quiver – good job – you could go one to make a DIY foam target in just a few easy steps.
Also read, what is the best material for a DIY achery target.