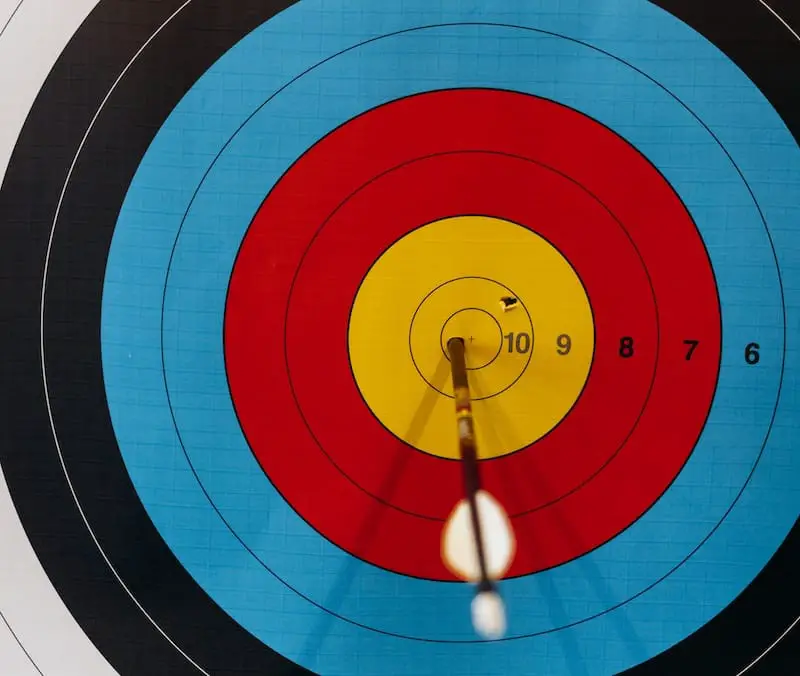
You know that practice makes perfect. This is absolutely true for a skill-based hobby, such as archery. Given its unique set of techniques involved, archers need to make sure they have the time and resources to fine-tune their performance. In the long term, spending money on memberships and cheap materials becomes burdensome, meaning that investing in foam targets is your best option. So I’ll give you the recipe on how to make a foam archery target and also give you the reasons why you should use foam targets.
As you work on your archery, whether you are just beginning or have been practicing for years, having an accessible and reliable target is key to improvement. Before you waste money on factory-produced, cheap targets, you’ll be better off by doing yourself a favor and making sure your setup is good from the start. Read on how to do this with DIY foam targets.

Why Use Foam For Targets?
Before we start on different design ideas and methods, a brief word on the benefits of foam is required. Anyone that has invested time and effort into any sort of craft knows that reliable equipment is necessary. Rather than getting tools that are either over-priced or easily broken, someone that’s passionate about their goals will make sure they’re only working with the best.
For archery, this means having targets made of foam. Their main point of attraction is their elasticity, which means that they can easily return to their natural shape after being punctured. This means that, even after long-term and heavy use, the foam will be able to heal itself each time, allowing you to reuse it throughout the years.
Additionally, the foam will be able to take care of itself both indoors and outdoors due to its resistance to environmental corrosion. Foam also won’t damage your arrows, as it absorbs impact and gives your arrows a soft target. Ultimately, foam is the absolute best material to use when investing in your archery equipment.
Other materials don’t offer this versatility and overall effectiveness. Wood, while durable, can damage your arrows. Paper can also be more expensive and won’t last as long as foam does. Hay is another popular material and works well but does not hold up against the environment as well as foam can.
As you close in on your plans for at-home archery training, it cannot be stressed enough how important the material is, no matter what kind of archer you are. If you’re a professional, you need reliability, or else your rank in competitions can suffer. At the same time, a beginner can get discouraged by the price and time of having to replace broken arrows or targets. In either case, don’t compromise, or else you will probably have a bad experience.
Making Foam Archery Targets
One basic idea that needs to be cleared up is that any target design is comprised of three parts:
- The frame – The frame is just the part that gives the target its shape and balance. It outlines the backdrop. Frames are usually made of wood but can also be constructed of plastic or metal.
- The backdrop – The backdrop is the part that your arrows will be shot into. This needs to be strong so that arrows won’t grow through it, but it also needs to absorb the blow to prevent breakage. For this article, only foam backdrops will be discussed.
- The bullseye – The final part and probably the simplest is the target or bullseye. This is the spot on the backdrop that you’ll be aiming for. Most people will likely go with the traditional layers of rings, but you’re more than welcome to get creative with this.
If you’re concerned about whether or not you have the right resources, you may want to take note of common materials needed for making foam targets.
The following are the common parts that are used, but are not required, for each and every design:
- Screws and nails
- Foam mats
- Box cutter and scissors
- Wooden plank and circular saw
- Duct tape and glue
- Threaded rods and wrench
- Washers and nuts
- Hammer and nails
- Power drill and drill bit
Finally, it needs to be understood that there is no single correct way that targets, foam or otherwise, must be made. This is why there are three different designs in this article; so you can be better informed about what might best suit your needs. Be sure to keep an open mind and think about what you like about each one.
Want to try and use other materials than foam for archery targets? Read this article about the best materials for archery targets.
Stacked Foam Target
One of the easier ways to make an archery target for yourself is with a tall stack of foam mats. By forming a wall of mats, archers can make firm shots, as well as decide which mats to keep and which to get rid of. In order to construct this, you’ll need:
- A multiple feet tall stack of foam mats (depends on your needs) and a boxcutter
- Circular saw
- Two wooden planks larger than the mats
- Four threaded rods that can cover the height of the stack and fit into the wood
- Threaded rod wrench
- Eight washers, eight lock washers, and eight nuts,
- Power drill that matches the size of the rods
This is definitely the largest project out of the three designs, as it requires multiple tools along with the understanding and knowledge needed to use them.
Once you have your materials, follow these steps to complete the design:
- Cut up your mats and wood to your liking (give extra room on the wood)
- Drill a hole in each corner on your wood, making sure that they align and can fit over each other perfectly and that your mats will fit in between them
- Take your bottom wood plank and put the threaded rods through the holes
- Secure the rods with your washers and nuts
- Place the stack of mats on top, making sure they stay under the height of the rods
- Put the other plank of wood on top through the rods
- Secure this into place with your washers and nuts, firmly tightening the whole design
All that’s left is to place your bullseye on the front of your backdrop and get to practicing. This is a relatively simple design and is also very reliable and easy to maintain. As mats become damaged over time, all that’s needed is to loosen the rods and either turn the mats around or replace them. It’s recommended that you either reuse old or buy cheap mats, considering how many you’ll need.
Open Box of Foam Target
This next design is similar to the last but is stacked horizontally rather than vertically inside of a box with two open spaces (one to insert the mats and one to shoot). The layers that the arrows pierce will function as a sort of armor.
To create a foam target, you’ll need the following materials:
- Stack of foam mats and boxcutter
- Hammer and nails
- Wooden planks (enough to cover the surface area of the entire stack of mats)
- Saw
Since it’s hard to say which measurements you’ll need without knowing the dimensions of your mats, it’ll remain unclear until you decide that for yourself. Once you have your materials, follow these steps:
- Cut up your mats to your liking (keep in mind that the broadside will be the target this time)
- Visualize how the mats will be stacked together horizontally with the thin sides facing up and the broadside facing you
- Saw your wood to the dimensions of the back of your mats
- Saw more wood to cover the bottom and two opposite sides of the stack, attaching them to the back
- This should leave the top and broadside of the mats uncovered
- Partially cover the broadside around the framing, leaving the middle exposed for target practice
- This can be done by making two small boards along the top and bottom of the side or
- Creating a wall that completely covers the side and cut out a spot for targeting.
- When making your partial box, make sure it will snuggly cover the mats to keep them pressed together.
This design makes it easier to change the mats but also requires you to either change them more often or move around your bullseye to get the most out of the surface area. Since you would probably use fewer layers here than you would on the previous design, you may want to invest in tougher foam mats to prolong durability.
Circular Foam Target
This option is a departure from the previous two designs and comes in the form of a cylindrical shape, fitting for a bullseye. This may look similar to most bullseyes that you are probably familiar with due to its shape.
Separating itself from the other two, this design does not use foam mats as layers for the backdrop. To make this target, you’ll need the following materials:
- Large roll of sheet foam
- Additional pieces of foam
- Packaging foil
- Metal wire
- Box cutter
- Hard material of choice (carpet, cardboard, cloth, etc.)
- Duct tape or sewing kit
Compared to the other two, the list of materials does not require any real skills with tools and construction. As such, all that’s needed to create this target are these simple steps:
- Cut the roll of sheet foam multiple times into different but equal-size rolls (like usual, the number of rolls depends on size and preference)
- Take one of the sections and wrap it around the additional pieces of foam, which will act as a center
- Wrap the finished layer in packaging foil to keep the shape held tightly
- Add another layer of the foam, which should also be wrapped in foil until it is completely covered
- Repeat the last step until all foam layers are used up
- Use your metal wire to create a rigid frame along the edges and tighten it to maintain the shape
- With your material of choice, create an outer shell to contain and protect the layers inside
- Seal the outer shell with duct tape or by sewing it
- If you choose, you can use any extra wire to hang the target, as well
This design is probably the simplest when it comes to the practicality of putting it together, as anyone can put it together without the need for being handy. However, there is the negative fact that in this design, the foam cannot be replaced like it can in the other options. So, when this target is used up and done, it’s done and needs to be remade completely.
Follow this step-by-step guide to set up an indoor archery range.
How Do You Know Which Design To Choose For You?
If you have no preference based on the availability of materials or skills, then you have the privilege of choosing between the three designs.
If you are looking to make your target last a long time, then the vertically stacked mats are your best option. The boards joined by the threaded rods will last quite a while if they are well-kept, allowing you to add and replace mats as needed.
The other two options won’t last as long, but this can be a positive if they need to be swapped out for another target. Since they are a small investment and disposable, it won’t be a loss to stop using them. If you want them to last, however, you’ll need to invest in strong, quality foam.
Also, it’s important to note that each design laid out here does not have to be followed as to the proverbial “letter of the law.” If you feel that there’s a modification you believe you’ll be more comfortable with and think would work better for you, then feel free to do so. This is all about what’s best for you and your archery, so the handiwork should reflect that as well.
Read this if you need to repair a damaged 3D archery target.
Do you need a backstop for an archery target?
A backstop for an archery target would not be necessary. Generally, a backstop is used as an added safety measure to catch arrows that miss the target. The backstop can also be used to prevent arrows from getting lost or causing damage to nearby property. It is not a requirement to have a backstop, but it is a good idea to have a backstop.
If you are making your own backstop, you can read about the best materials for the backstop here. Also, wondering if you can use tarp as material for the backstop, then read this.
Final thoughts
Archery can be a wonderful hobby and passion, which means that it should be met with adequate attention and care to be fully enjoyed. This involves many hours of research and practice to reach your full potential as an archer, whether you be a competitor or a dedicated enthusiast. Anyone that has goals and passions understands this drive to do well is special and enriching.
If someone cares so much about their craft, then they should make sure that they have the right tools to support their journey. For archers, a good way to go about this is by getting yourself foam targets for practice. Ideally, for those looking to put some serious time into archery, foam targets are great for performance and can be created at home.


